DIY Salt Dough Ornaments for Kids and Adults
Picture this: a tight-knit family around the kitchen table. Laughter fills the air. Hands busily mold and create. The cozy season wraps you in warmth. Crafting your own handmade Christmas decor comes to life. All it takes? A simple mix of flour, salt, and water—the classic, foolproof salt dough recipe. These charming creations make DIY salt dough ornaments a holiday favorite for all ages. Add festive shapes, painted details, or glittery touches to make memories that last. Let’s dive right in!
Table of Contents
- What Are Salt Dough Ornaments?
- Ingredients and Tools Needed
- The Perfect Salt Dough Recipe for Beginners
- Step-by-Step Guide to Making Salt Dough Ornaments
- Creative Ornament Ideas for Kids
- Advanced Techniques for Adults
- Decorating Tips for Stunning Results
- Preservation and Storage Tips
- Benefits of Salt Dough Ornament Making
- Conclusion: Cherish Your Handmade Creations
1. What Are Salt Dough Ornaments?
Have you heard of salt dough ornaments? They are a fun craft, very popular in December. They are like family heirlooms but much easier to replace if dropped. These handmade items are a beloved Christmas tradition. They are also very versatile. Whether you are a crafting expert or like to experiment, there is always space for salt dough creativity in winter.
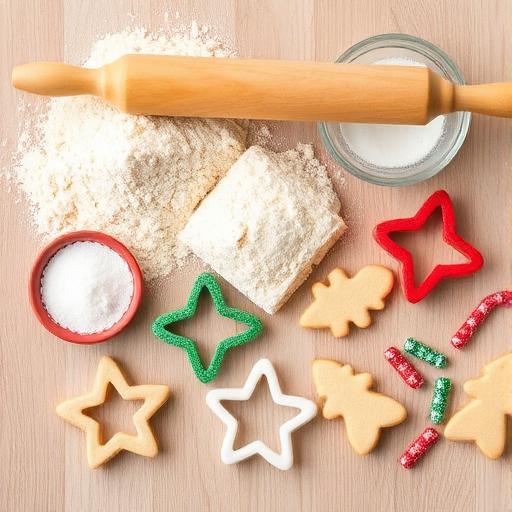
2. Ingredients and Tools Needed

All great projects start with a solid plan, right? Or at least a semi-decent list. For our DIY salt dough ornaments, you just need a few basic ingredients:
- Flour
- Salt
- Water
Oh, and every artisan needs their trusty tools. So grab these essentials:
- Rolling pins (or sub in a wine bottle—no judgment here!)
- Cookie cutters in fun, festive shapes
- Baking trays
Feeling fancy? Grab some optional extras like stamps, glitter, and food coloring. Just don’t go full-on Monet just yet.
3. The Perfect Salt Dough Recipe for Beginners
Honestly, the best recipes are those as easy as pie—or, in this case, dough. Here’s your go-to salt dough recipe:
- 2 cups all-purpose flour
- 1 cup salt
- 3/4 cup to 1 cup water (add it slowly)
Mix your flour and salt first. Then slowly add the water while you work the dough until it’s smooth and pliable. Too sticky? Dust in some more flour. Feel free to get hands-on—consider dough mishaps part of your moisturizing routine.
4. Step-by-Step Guide to Making Salt Dough Ornaments
Ready to roll? Here’s how to turn that dough from blob to bling:
- Preheat your oven to 250°F (120°C).
- Roll out dough on a lightly floured surface until it’s about 1/4 inch thick. (It’s an ornament, not a napkin, keep it thick!)
- Cut out your chosen shapes using cookie cutters.
- Poke a hole at the top of each shape with a straw, unless you want abstract art that won’t hang.
- Place ornaments on a baking tray, bake for 2-3 hours. They should feel hard and dry, a bit like your pet rock collection from 1999.
- Cool completely before decorating.
Did I mention flour fights? I know, right? They’re the best part!
5. Creative Ornament Ideas for Kids
Gather the kids! It’s time for their imaginations to go wild. Here are some fun ideas sure to be a hit:
- Shape dough into cute animals like penguins and reindeer.
- Use toy imprints for fun textures. LEGO bricks? Yes! Action figures’ boots? Why not? Just get permission first!
- Collect leaves or pine cones for nature-inspired prints.
Watch their eyes light up with every squish and stamp—a true family holiday activity miracle!

6. Advanced Techniques for Adults
Calling all craftsy grown-ups! Put down the pasta machine—it’s time for salt dough sophistication. Here’s what you can try:
- Marbling with food coloring for a swirly, artsy effect. Think Van Gogh with less ear drama.
- Engraving names or messages into the dough before baking.
- Use metallic paints for that professional showroom shine.
Believe me, the end results will make you wonder why you ever bought ornaments in the first place.
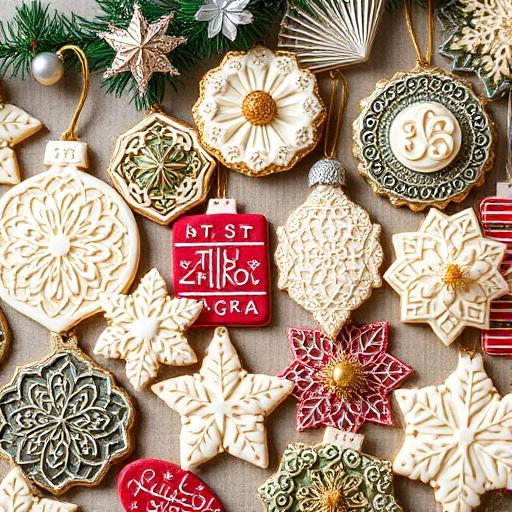
7. Decorating Tips for Stunning Results
Break out the acrylic paints, markers, and a sequin or two—because who doesn’t love a touch of sparkle?
- Stick to two or three main colors for a cohesive look. Or just go for that unicorn vibe!
- Add some spark with glitter. Just remember: glitter is a commitment. You’ll be finding it forever.
- Paint pens work great for fine details and avoiding those pesky brush mishaps.
And if you end up with a glitter tidal wave, well, now you’re just preparing for next year. That’s right…efficient!

8. Preservation and Storage Tips
Want to keep your masterpieces looking fresh year after year?
- Seal them with clear varnish or mod podge. Let dry completely.
- Store each ornament wrapped in tissue paper, tucked in a box, away from dampness.
Gift them to friends and family for a cheerful holiday surprise—just be ready for requests for extras next year!
9. Benefits of Salt Dough Ornament Making
Besides building a burgeoning ornament empire, there are real perks to this winter craft idea:
- It’s great stress relief. Kneading dough? Instant zen.
- Your creativity gets a major boost. Who knew you had the artistic chops of a young Picasso?
- And best of all, it’s a bonding experience, stitching together timeless memories.
Embrace the little imperfections; they add charm to each piece.
10. Conclusion: Cherish Your Handmade Creations
As you hang your newly minted ornaments, take a moment. Bask in the glow of your handiwork. These aren’t just trinkets—they’re bits of joy, shaped with love, laughter, and maybe a struggle or two. Display them proudly as a testament to your crafting spirit. Remember, the best holiday traditions are those made with heart. And yes, I really mean it!
If you’re looking for more DIY inspiration, don’t miss our Easy Eco-Friendly Summer Crafts for Kids or explore How to Make Custom Candles for Every Season. Let’s keep crafting magic alive all year round!
Author


